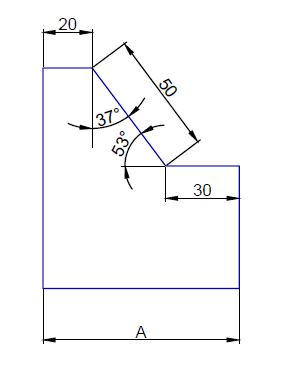
This Exercise was first introduced in this AutoCAD quiz. Feel free to check it to find out what the height of the image is.
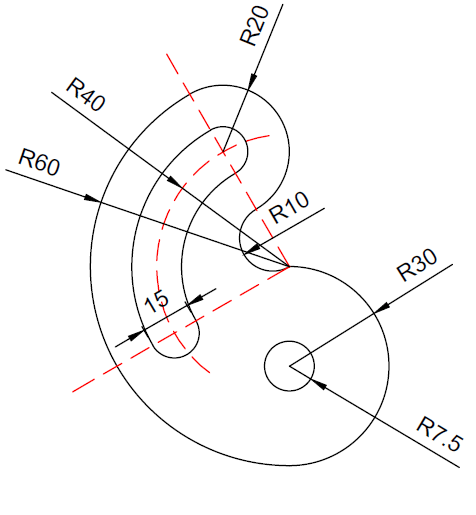
The value of A will unveil itself after drawing the part you are given information about.
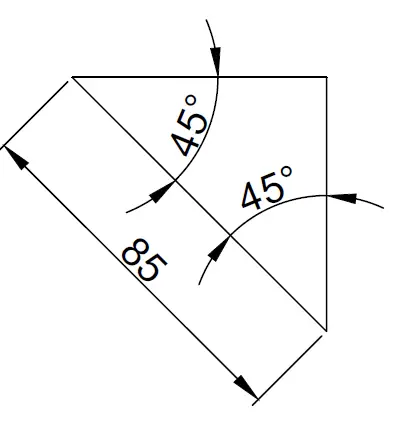
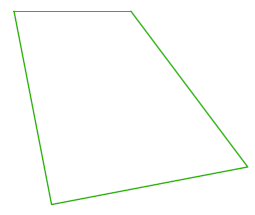
The following image gives some missing information you will need.
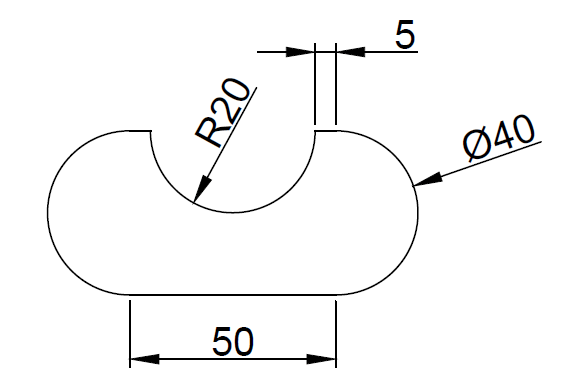
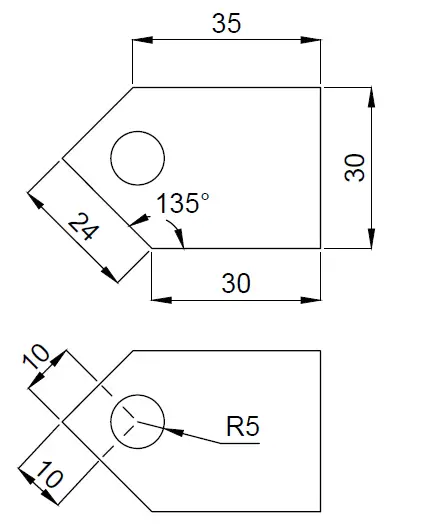
This is an easy one. It was actually first introduced when we learned how to draw circles and how to trim in AutoCAD.
Free eBook: AutoCAD exercises
Free eBook: Download this Series of Projects and learn AutoCAD on the go. Looking to learn AutoCAD the fastest way possible?
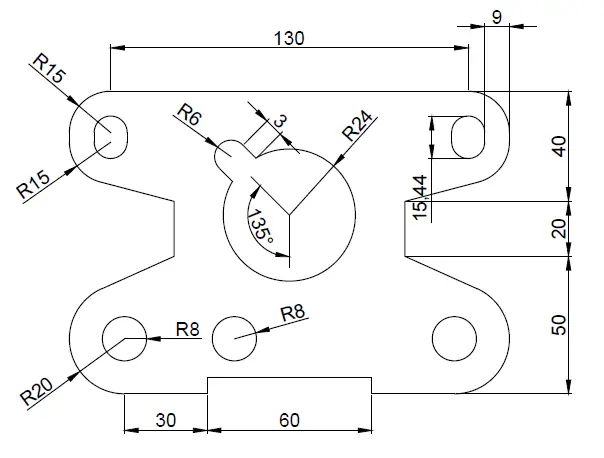
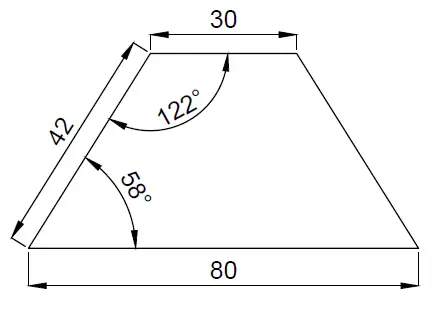
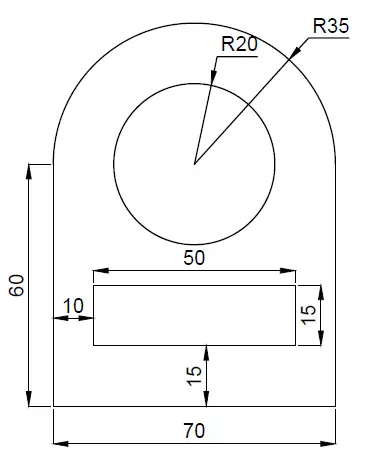
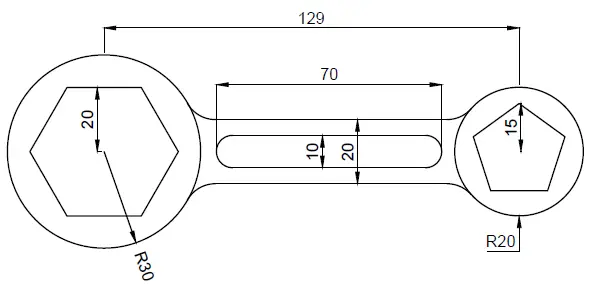
This is a cool exercise that will help you think a little bit. All dimensions are given!
While you are it, I believe you should check this AutoCAD quiz.
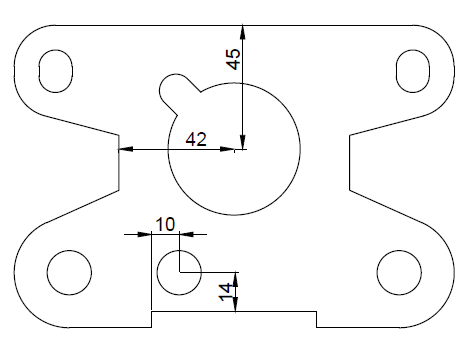
This exercise first appeared in this AutoCAD practice exercise.
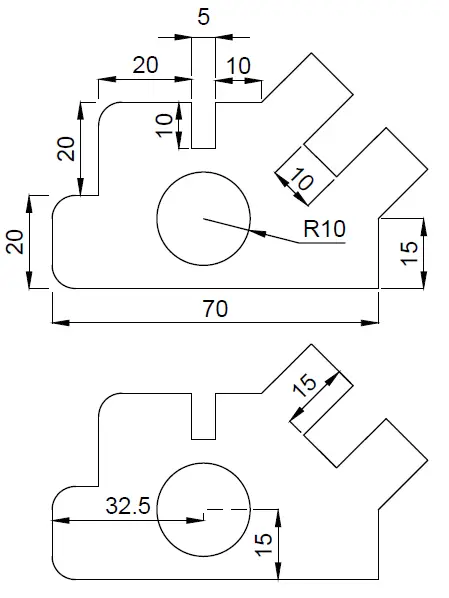
If you were able to complete previous exercises, this one could be boring nevertheless it is not totally unnecessary to have it on the list. I should have put it above 😉
If you find any difficulties working on these Exercises, Here is what you need to do. Either drop a comment below or simply visit the series learn AutoCAD Basics, Each of these exercises was treated in depth in the last CAD series.
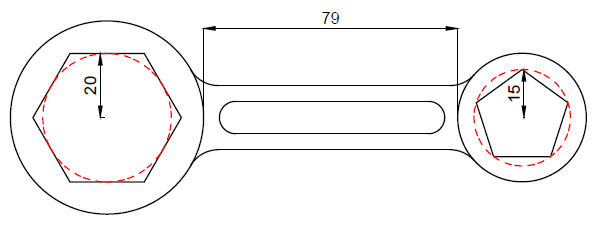
Let’s use the image below to practice in AutoCAD.
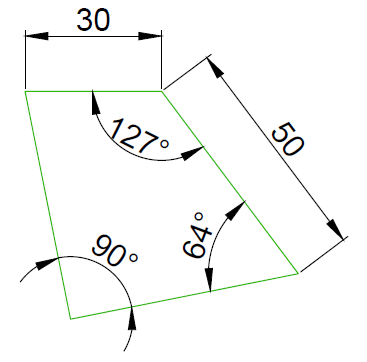
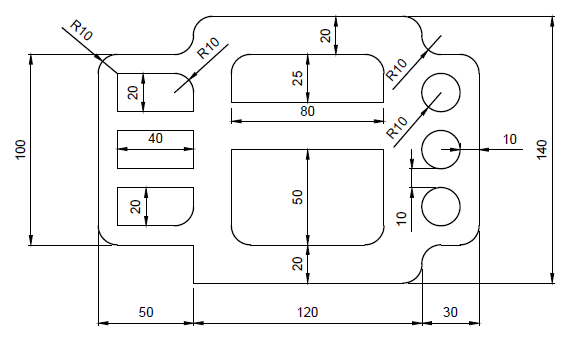
The following figure is a 2D figure and where all data are being provided. We should be able to replicate this with ease.
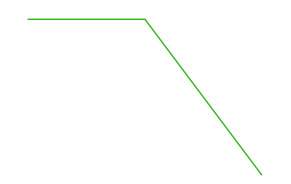
Draw the following line
Draw the second line starting from the right end of the previously drawn line.
Draw a line starting at the left end of the 30 unit line using @5050 of length is arbitrary chosen and the angle 79 is found by doing 360-90-64-127 – the Sum of angles in any Quadrilateral is 360 degrees).
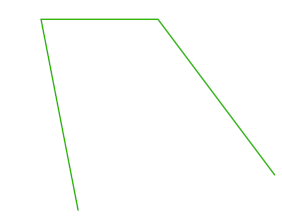
Draw a line of an arbitrarily chosen length but make sure it forms 64 degrees with the line we have created in Step 2
(You can do this by creating a line aligned with the line with created in Step 2 and rotating it with 64 degrees counterclockwise)
What I will do here is:
Rotate the line created in step 2 from its bottom end with 64 degrees counterclockwise.
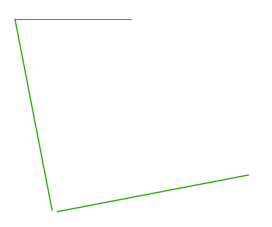
Create a line on the open side of the quadrilateral from the 2 points such as having the following.
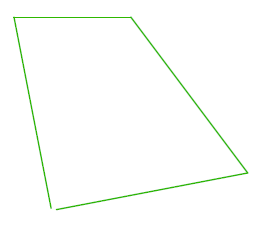
Use the Fillet command with R=0 to join those two lines to close that hole at the bottom of the figure
Hope this has given you a glimpse of it all. Now you have more than what you need to start playing on your own